 19 min read
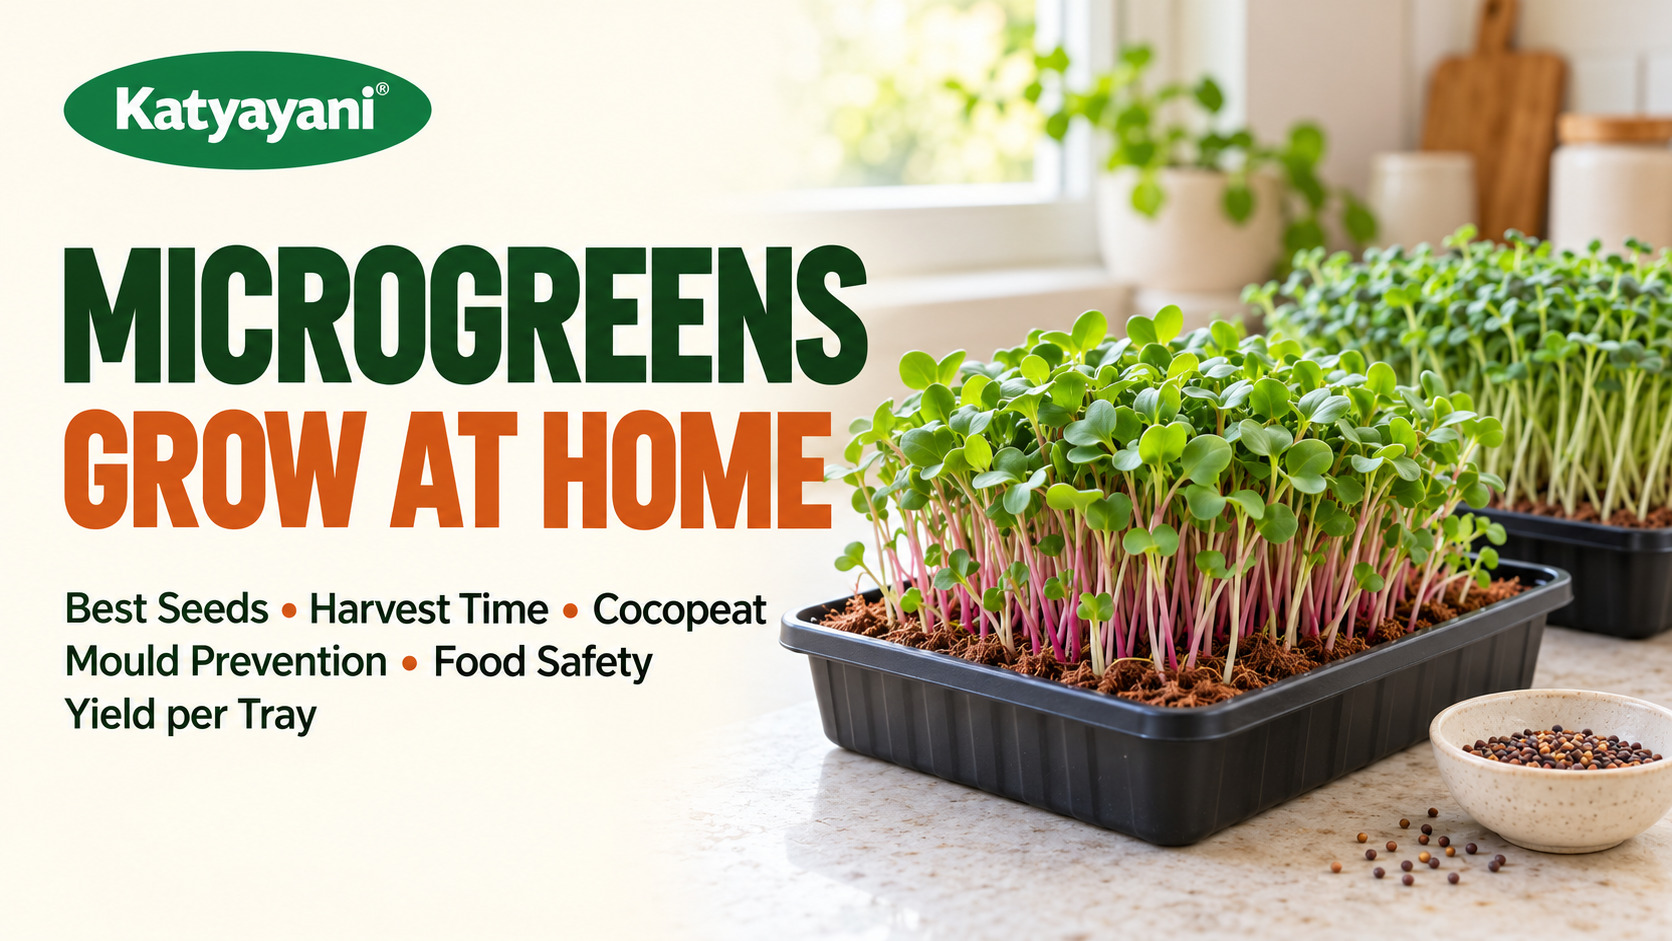
Microgreens are young vegetable or herb seedlings cut about 7 to 21 days after germination, with the stem and first leaves. For a first tray, sow radish, mustard or fenugreek on damp cocopeat in a shallow tray with drainage, keep it covered and dark for 1 to 3 days, then give bright light, gentle bottom watering and good airflow. Radish is ready in about 8 to 12 days, sunflower and pea in about 8 to 10. Most microgreens do not regrow. Buy untreated seed, keep trays clean, and do not treat microgreens as risk-free raw food.
What are microgreens?
Microgreens are very young vegetable or herb plants, cut when the first seed leaves have opened or the first true leaves are just showing. UF/IFAS Extension describes them as young, tender greens harvested at the cotyledon stage or when the first true leaves emerge, cut just above the soil. At harvest they are 7 to 21 days old, depending on the crop.
You eat the stem and the small leaves. The root stays behind. That one point matters later, in the food safety section.
Microgreens are not a special plant. They are ordinary seeds grown thick in a tray and cut early. Radish, mustard, fenugreek (methi), coriander (dhaniya), sunflower, pea and broccoli seed all work. Colours and flavours change from crop to crop: radish is sharp and spicy, sunflower nutty, pea sweet.
People grow them because they are quick and need very little space. A windowsill, a tray and a packet of seed is enough to start. That is also why they are easy to get wrong in small ways: too much water, too little air, dirty trays. The sections below cover each of those.
What is the difference between microgreens, sprouts and baby greens?
Sprouts are harvested before true leaves form and are eaten with the root. Microgreens are cut above the medium once the first leaves open. Baby greens are older, larger leaves of a normal crop such as spinach or lettuce. The three differ in age, growing method and food safety risk.
| Sprouts | Microgreens | Baby greens | |
|---|---|---|---|
| Age at harvest | A few days, before true leaves | About 7 to 21 days (cotyledon to first true leaves) | Several weeks; more mature leaves |
| How grown | In water or damp containers, warm and humid, often without light | In a growing medium such as cocopeat, with light | In soil or beds like a normal crop |
| What you eat | Seed, shoot and root together | Stem and young leaves; root left behind | Leaves |
| Main safety concern | Warm, humid, dark growing favours bacteria; contaminated seed is the usual source | Contaminated seed and unclean trays or water; recalls reported | Standard fresh-produce risk |
| Source | UF/IFAS Broward, Frontiers 2023 | UF/IFAS Broward, USU | UF/IFAS Broward |
The 2023 Frontiers paper says sprouts are grown in warm, humid conditions in drums or containers, and that this humidity and absence of light can favour bacterial pathogens more than microgreen conditions do. It also says microgreens, like other fresh produce, can carry foodborne illness risk. So microgreens are not the same as sprouts, but they are not risk-free either.
Many Indian recipes use the word sprouts for moong or chana soaked in a cloth overnight. That is the sprout method. A tray of mustard on cocopeat is the microgreen method.
Which microgreens are easiest to grow for beginners?
Start with radish, mustard, fenugreek (methi), sunflower or pea shoots. Radish germinates fastest and is ready in about 8 to 12 days. Mustard and methi are cheap, easy to find and forgiving. Sunflower and pea are sturdy and pleasant to eat, but need a soak and more seed. Coriander is slower and fussier.
In the 2026 ICAR paper from Samastipur, Bihar, radish had the fastest germination (2.30 days) and the highest germination percentage (94.10 percent) of 16 species tested in cocopeat. Fenugreek germinated in about 5 days with 90.22 percent germination. Coriander was the slowest at 12.27 days. That matches what home growers see: radish and mustard jump up, coriander makes you wait.
- Radish (mooli): fastest, spicy, high success rate. Best first tray.
- Mustard (sarson): quick, sharp flavour. Mustard seed from a farm-input store is usually treated, so check before you buy.
- Fenugreek (methi): slightly bitter. A good one for dal and paratha stuffing.
- Sunflower: thick, nutty, needs seed with the hull intact and a 12-hour soak (Utah State).
- Pea shoots: sweet, fast, needs a lot of seed (150 g per tray in the Utah State table).
- Broccoli: mild, easy once you have the routine.
- Coriander: slow and uneven; leave until your second or third tray.
If you like the plant itself and want to grow it to harvest size later, see our full guides on radish (mooli) farming, mustard farming and fenugreek (methi) farming. Those are field-crop guides. This one is only about seedlings in a tray.
How much seed, how long to soak and how many days to harvest, crop by crop?
Utah State Extension gives seed weight for a standard 1020 tray (10 x 20 inches, about 25 x 51 cm), whether to soak, how many days to keep the tray covered and the days to harvest. Use these as a starting point and adjust after your first tray.
| Crop | Seed per 1020 tray | Soak | Covered (dark) days | Days to harvest |
|---|---|---|---|---|
| Radish | 42 g | None | 1 to 2 | 8 to 12 |
| Rutabaga (a mild, mustard-flavoured relative) | 28 g | None | 1 to 2 | 8 to 12 |
| Sunflower | 48 g | 12 hours | 3 | 9 to 10 |
| Pea shoots | 150 g | 6 hours | 3 | 8 to 10 |
| Broccoli | 28 g | None | 2 to 4 | 8 to 12 |
| Cilantro (coriander) | 28 g | None | 7 to 14 | 21 to 28 |
Source: Utah State University Extension. Mustard and fenugreek (methi) are not in that table, so follow the sowing density on the seed packet and cut at the first true leaves. Only sunflower and pea need a soak in the table; the rest are sown dry.
What equipment do you need to grow microgreens at home?
You need a shallow tray with drainage holes, a second tray without holes for water, a growing medium, seed, a spray bottle or small jug, a weight or a second tray for the dark period, and a bright place. A small fan is the one item most beginners skip and later wish they had. Total cost can stay low.
- Trays: Utah State recommends shallow 1020 trays with drainage holes and says pie tins or takeout trays can be reused. A tray 3 to 5 cm deep is enough.
- A second, solid tray: to sit under the first. USU uses a second tray to cover seeds in the dark phase as well.
- Medium: cocopeat, a seed-starting mix or a grow mat. More in the next section.
- Seed: untreated, and ideally sold for sprouting or microgreens. South Dakota State says to buy untreated seed, preferably certified organic, because seed treatments can end up in the shoots you eat.
- Water: a fine spray bottle for the first days, then bottom watering.
- Light: a bright windowsill or an LED or fluorescent light on a timer.
- Airflow: USU recommends constant airflow from a gentle fan, especially near a sunny window.
- Clean scissors and a strainer: for harvest and rinsing.
Don't buy a kit before you know you will keep going. A food-grade plastic tray with holes drilled in the base and a baking tray underneath is a fine start.
What is the best growing medium for microgreens: cocopeat, soil or a vermicompost mix?
Cocopeat (coir) is the best-documented choice. Utah State recommends seed-starting mix, coir or a grow mat, and the 2026 Indian ICAR trial used sterile cocopeat in perforated trays. South Dakota State recommends a soilless mix. Garden soil is not advised: it carries disease organisms and drains badly in a shallow tray.
Utah State's method for coir: pre-moisten it until it feels like a wrung-out sponge, wet in the hand but with no water dripping when squeezed. It adds about 2 quarts of coir to a 1020 tray. Cocopeat bricks sold in India are compressed, so soak and fluff them first, then check the feel.
Vermicompost is not needed. Microgreens are cut within 7 to 21 days, and UF/IFAS says they need no fertiliser or pesticide because of the short growing time. Raw or wet compost carries moulds and bacteria, which is the opposite of what a thick, humid tray needs, so keep compost for larger plants and sow microgreens on clean cocopeat.
For your bigger pots and containers, our guides on the terrace garden soil mix and the winter kitchen garden feeding schedule cover compost and liquid feed for larger plants. Those are for plants you will grow for weeks, not for a seven-day microgreen tray.
Reusing Medium: Do not reuse a tray of cocopeat that had mould or damping-off. The Pacific Northwest handbook says medium that had damping-off should not be reused unless heat-treated, steamed or chemically disinfected. Used roots-and-medium mats from healthy trays can go into pots or compost, not back into a fresh microgreen tray.
How do you grow microgreens at home, step by step?
Wet the cocopeat, fill the tray, spread soaked or dry seed evenly, press it down, cover the tray in the dark for 1 to 3 days, then move it into bright light and water from below. Cut at 7 to 14 days for fast crops. The steps below follow Utah State and South Dakota State.
- Clean everything. Wash hands, trays and scissors. South Dakota State asks for new or sanitised flats and clean cutting tools.
- Prepare the medium. Pre-moisten cocopeat to a wrung-out sponge feel. Fill a tray about 2 to 3 cm deep and level it gently.
- Soak seed if needed. Sunflower 12 hours, pea 6 hours (Utah State). Drain well.
- Weigh and spread the seed. Scatter evenly, thick but not in heaps. Larger seed such as pea should be about 1/2 to 1 inch apart, says South Dakota State. Press it into the surface; don't bury it.
- Mist and cover. Spray lightly. Cover with another tray and put a 2 to 5 pound weight on top (Utah State), or cover with a plastic bag for near 100 percent humidity (South Dakota State).
- Blackout for 1 to 3 days. Utah State keeps radish covered for 1 to 2 days, sunflower and pea for 3, and broccoli for 2 to 4. Look for white rootlets pushing into the medium.
- Uncover and move to light. Open the bag gradually over a couple of days if you used one.
- Water from below. Pour water into the solid tray under the perforated one. Once the top feels damp, drain what is left after about 30 minutes (Utah State).
- Add airflow. A small fan on low, 1 to 2 metres away.
- Harvest. Cut just above the medium with clean scissors when the first true leaves show, or a little earlier (Utah State). Rinse, dry, refrigerate.
- Start the next tray. Keep a new batch going every few days so you always have something ready.
Skip the blackout and the seed floats up, dries and fails. Skip the airflow and the tray goes fuzzy. Those two are the most common beginner errors.
How much light, temperature and water do microgreens need?
Use bright light after the dark period, a room around 20 to 23 degrees C, and keep the medium damp but never waterlogged. Utah State runs lights 18 hours a day. A sunny windowsill also works. Water gently from below once the seeds have sprouted so the tops stay dry and mould has less to grow on.
| Factor | What the sources say | Source |
|---|---|---|
| Light | Natural sun or a grow light on a timer, 18 hours on and 6 off. A south-facing window can work but winter days can be short | Utah State |
| Light (windowsill) | A sunny windowsill or supplemental lights; once seeds sprout, full sun or fluorescent or LED lights | South Dakota State |
| Temperature | 74 F (23 C) for germination, 72 F (22 C) lights on, 68 F (20 C) lights off | Utah State |
| Temperature (home) | 60 to 70 F (16 to 21 C) and about 55 percent humidity | UF/IFAS Broward |
| Watering | Medium like a wrung-out sponge; bottom water; drain extra after 30 minutes | Utah State |
| Humidity cover | Plastic bag for near 100 percent humidity until seeds emerge, then open it over a couple of days | South Dakota State |
| Airflow | Constant gentle airflow, especially near a sunny window | Utah State |
| Feeding | None needed for the short growing time | UF/IFAS Broward |
In hot months, sow in the coolest, best-ventilated room you have and keep the fan running. Heat and trapped humidity inside the tray are what mould likes.
Water is where most trays fail. Utah State's pre-moisten step and bottom watering are designed to keep the surface from staying wet. If the surface looks shiny and the tray smells sour, you have watered too much.
How do you prevent mould and damping-off in microgreens?
Use clean trays and fresh medium, sow thin, keep air moving, water from below and avoid a cold, wet, stuffy room. The Pacific Northwest handbook lists cold wet media, high humidity, overcrowded seedlings, poor ventilation and contaminated media or equipment as the conditions that favour damping-off.
Damping-off is a group of soil fungi and fungus-like organisms (Pythium, Fusarium and Rhizoctonia are named). The Pacific Northwest handbook lists these symptoms: seeds that never emerge, a sunken dark lesion at the soil line, and seedlings that collapse when it rings the stem. In a microgreen tray you see patches that suddenly flop over.
- Clean trays between batches. The handbook suggests washing, then rinsing or soaking in a disinfectant such as 10 percent bleach or 3 percent hydrogen peroxide. Rinse well afterwards.
- Start with clean medium. The handbook recommends heat-treating growing medium at about 70 degrees C for 30 minutes with aerated steam in a nursery. Don't try that at home; buy fresh cocopeat for each batch instead.
- Don't crowd the seed. Overcrowded seedlings are on the handbook's list of risk factors.
- Keep air moving. A fan is Utah State's advice.
- Water from below and drain extra water. Don't leave a tray standing in a pool.
- If disease starts, the handbook says to reduce watering so the medium dries somewhat around the plants and to maximise airflow and light. Remove and discard the affected patch.
- Don't eat a tray with mould on the stems or leaves. Throw it away with the medium.
If you also grow vegetables in pots, the same overwatering habit causes root problems there; our guide on root rot in containers explains the signs and how to recover plants.
Seed Disinfection: What Study Shows: The 2023 Frontiers study tested a 10-minute soak in 3 percent hydrogen peroxide followed by 20 hours of dry heat at 60 degrees C on microgreen seed. It reduced bacterial counts by 1.2 to 3.4 log without significantly affecting germination. The authors say it was not tested against specific foodborne pathogens, and that there is no established standard for microgreen seed decontamination. So this is research information, not a home recipe.
Are microgreens safe to eat raw? Salmonella, E. coli and sprouts
Microgreens are eaten raw, so seed and hygiene decide the risk. Researchers say there had been no confirmed outbreaks linked to microgreens up to 2023, but recalls for Salmonella and Listeria have happened. In October 2026 FDA reported an outbreak linked to broccoli sprouts and microgreens grown from a contaminated seed lot. Take food safety seriously.
| Point | What the source says | Source |
|---|---|---|
| Sprout outbreaks | 52 reported outbreaks of foodborne illness associated with sprouts from 1996 to 2020, at least 2,700 cases of illness, 200 hospitalisations and three deaths | FDA sprout guidance |
| Seed as the source | Investigations that found a source often identify seeds used for sprouting; poor sanitation has also contributed | FDA sprout guidance |
| Microgreen recalls | Recalls due to Salmonella and Listeria monocytogenes; no confirmed outbreaks associated with microgreens (as of the 2023 paper) | Frontiers 2023 |
| Recall frequency | About six to eight microgreen recalls in the three years before July 2022, for possible Salmonella or Listeria | University of Arkansas, 2022 |
| E. coli in seed | In 102 microgreen seed samples bought online, E. coli was not detected; coliforms were found in 48 percent of samples; one onion seed sample screened positive for Salmonella by PCR but no viable cells were recovered | Frontiers 2023 |
| Current outbreak (Oct 2026) | Salmonella Bovismorbificans: 32 illnesses, 3 hospitalisations, no deaths, six US states, illness onsets 7 July to 3 September 2026. Of 26 who reported eating sprouts or microgreens, 22 reported broccoli sprouts and one reported a microgreen mix containing broccoli microgreens. Linked to a contaminated broccoli seed lot | FDA outbreak page, status ongoing as of 9 Oct 2026 |
| Virus persistence | A norovirus surrogate persisted in two soil alternatives through a 10-day growth cycle, with the count dropping from 10 million to 100,000; the researcher warns indoor growing can create a false sense of control | University of Arkansas, 2022 |
Two things to take from this. First, the difference between sprouts and microgreens is real: a microgreen is cut above the root and grown in less humid, lit conditions. Second, it is not a guarantee. The Salmonella outbreak in October 2026 involved broccoli seed sold for sprouting, and shows that seed can bring bacteria into a tray whatever you do afterwards. FDA's own page says this outbreak is being investigated separately from a second outbreak with shiga toxin-producing E. coli and Salmonella that is linked to alfalfa sprouts.
Symptoms. The FDA outbreak page says illness usually starts 12 to 72 hours after eating contaminated food and lasts four to seven days, with diarrhoea, fever and abdominal cramps. Children under five, older adults and people with weakened immune systems are more likely to have severe infections. If someone in your home is in one of those groups, ask your doctor before serving raw microgreens, or choose cooked greens instead.
How can you lower the food safety risk at home?
Buy untreated seed from a reliable seller, keep trays and tools clean, use fresh medium for each batch, cut above the medium, rinse and refrigerate soon after harvest. Wash your hands before sowing and cutting. These steps do not make raw food sterile, but they remove the most avoidable risks.
- Choose seed carefully. South Dakota State says to buy untreated seed, preferably USDA certified organic. Check the packet or the dealer's invoice for the lot number. If a recall is announced, you can then check your lot against it. FDA told consumers not to eat, serve or sell recalled broccoli seed lots in October 2026.
- Use seed made for sprouting or microgreens. Kitchen methi or mustard seed will sprout, but it is not sold or screened for raw eating as sprouts. Fungicide-treated agricultural seed is a different issue: treatments can end up in what you eat. Seed sold for sprouting is not a guarantee either, as the current outbreak shows.
- Wash hands before sowing and before harvest. Harvesting is direct contact with the crop, which the Arkansas researcher highlights.
- Use clean trays, new medium and clean scissors. South Dakota State advises new or sanitised flats and cutting tools.
- Keep liquid fertiliser off leaves and stems, and don't leave mixed fertiliser sitting at room temperature. South Dakota State warns pathogens can grow in stored nutrient solution.
- Rinse after cutting. Rinse in cool water in a strainer, shake and pat dry or use a salad spinner (South Dakota State).
- Refrigerate the same day. More in the storage section.
- Discard any tray with sour smell, slime or visible mould.
Hydroponic and water-based growing has its own food-safety points, since water can spread problems quickly. See our hydroponics for beginners guide if you plan to move to that.
Are microgreens healthy? What studies actually report
Studies report that some microgreens contain higher concentrations of certain vitamins and carotenoids than the mature leaves of the same vegetables. That is a laboratory measurement. It does not show that eating microgreens improves health outcomes in people, and portions are small, so treat them as a nutrient-dense garnish rather than a main food.
The best-known study is Xiao and colleagues (2012) of the University of Maryland and USDA. It measured vitamin C, carotenoids, vitamin K1 and vitamin E in 25 commercially sold microgreens. In that study red cabbage had the most ascorbic acid (vitamin C), cilantro the most carotenoids, garnet amaranth the most vitamin K1 and green daikon radish the most vitamin E. Compared with mature leaves in the USDA nutrient database, the microgreens were more nutrient-dense. The authors say the data could support nutrient databases and recommendations.
The Indian 2026 ICAR paper tested 16 species in cocopeat at Samastipur. It reports that fenugreek had the highest total phenol content and the highest chlorophyll (with radish), that radish and carrot showed strong antioxidant capacity in a FRAP assay, and that fenugreek and carrot showed strong radical-scavenging in a DPPH assay. Moisture content was 88.5 percent (radish) to 93.5 percent (lettuce). Antioxidant assays are lab tests of plant extracts and do not tell you what happens in your body.
When and how do you harvest microgreens? Do they regrow?
Cut with clean scissors just above the medium when the first true leaves appear, usually 7 to 14 days for radish, mustard, sunflower and pea. Most microgreens do not regrow after cutting. Pea shoots are the exception and can be cut once more. Sow a new tray rather than waiting.
Cut at the first true leaves, when the plants are about 2 inches (5 cm) tall. Taste a few stems each day from day 7 and pick the stage you like; cutting earlier gives a milder flavour and cutting later gives bigger, stronger leaves.
- Time of day: harvest when the leaves are dry. Wet leaves rot faster in the fridge.
- Method: pinch a handful, cut at the stem base, leave the medium and roots behind. Don't pull the plants up.
- Regrowth: UF/IFAS Broward says broccoli, radish, kale, mustard and sunflower do not regrow after cutting; pea shoots (and wheatgrass) can. Mississippi State says pea shoots "can be recut once".
- What to do with the used mat: put it in compost or use it as a top layer in a larger pot, only if it was healthy.
How do you store microgreens?
Rinse in cool water, dry well, put into a clean container with a paper towel and refrigerate. South Dakota State says to eat them right away or keep them in a plastic bag or container for about a week. Eat them as early as you can.
Dry them well. Water left on leaves is the quickest way to slime in the fridge. A salad spinner and a clean tea towel work well.
You can also cut only what you need and leave the rest of the tray growing, as long as the tray stays in light and the medium stays damp. Sunflower and pea hold up best. Fine leaves such as coriander and broccoli wilt quickly once cut.
Add microgreens to food just before serving. Cooking reduces both the crunch and the point of using them. Put them on dal, rice, sandwiches, parathas, raita or salads.
How much can you harvest from a tray?
Yield depends on seed quality, seed weight, light, harvest stage and tray size, so there is no single number. Weigh the cut greens from your first few trays and use those figures to plan how many trays you need each week.
- Weigh each harvest: note the crop, seed weight, days to cut and grams harvested.
- Adjust one thing at a time: change seed weight, light or cut day, not all three.
- Plan by use: grams you eat per day multiplied by days between harvests gives the tray size or number of trays you need.
- Stagger sowing: two trays started three or four days apart keep a steady supply.
Can you earn money from microgreens? A simple cost and margin formula
It can work at small scale if you have buyers before you have trays. Income depends on three numbers you must find for yourself: what a buyer will pay per 100 g, how much of each tray you actually sell, and what each tray costs you to grow and deliver.
Formula: Profit per tray = (grams harvested x share sold x price per 100 g / 100) minus cost per tray. Cost per tray = seed + cocopeat + packaging + water and power + delivery and your time. Replace every input with your own bill.
| Cost head | What to record |
|---|---|
| Seed | Cost of seed used per tray, from your invoice |
| Growing medium | Cocopeat used per tray |
| Packaging | Box, label and paper towel per pack |
| Water and power | Lights and fan running hours per tray |
| Delivery | Fuel or courier cost per order |
| Your time | Hours per tray for sowing, watering, cutting and packing |
Before you buy a rack, get a restaurant, hotel kitchen or gym to agree on a weekly volume and a price. Fresh cut microgreens last only days (see storage), so selling is the hard part, not growing.
If you want to see how larger commercial growing and vertical racks work, see our guide on vertical farming and hydroponics business models. For other small ideas, see low-investment agriculture business ideas. Selling raw microgreens may bring licensing and food safety rules for you as a seller, so check FSSAI requirements for your scale before you sell.
What are the common microgreen problems and how do you fix them?
| Problem | Likely cause | Fix |
|---|---|---|
| Seeds don't sprout, or sprout unevenly | Old or low-quality seed, too dry, too cold; coriander and carrot are slow naturally | Use fresh seed; keep the medium damp; extend the covered period by a day; be patient with coriander (12 days to germinate in the ICAR trial) |
| Patches suddenly collapse | Damping-off from wet, cold, crowded, stuffy conditions | Cut watering, add a fan, sow thinner, discard the patch and clean the tray (Pacific Northwest handbook) |
| Fuzzy white growth on stems or soil that spreads | Mould | Discard tray; more airflow; bottom water; sow thinner; sanitise tray before reuse |
| Tall, thin, pale seedlings | Too little light | Move to a brighter spot or add an LED/CFL lamp (Utah State uses 18 hours a day) |
| Yellow leaves | Too little light, or waterlogged roots; older seedlings past harvest | Increase light, cut water and harvest sooner |
| Seed hulls stuck on leaves | Normal for sunflower, coriander, beet | Rinse after cutting; brush off, or use the hull as a mild flavour (coriander) |
| Seed floating or washing away | Heavy watering from above | Mist, or bottom water |
| Sour smell, slime | Overwatered or poor airflow | Discard; start a fresh tray |
| Tray tastes bitter or too strong | Cut too late | Cut earlier at first true leaves |
| Small yield | Low seed rate, low light, early cut | Add a little more seed, increase light, cut a day later |
| Insects (fungus gnats) on the surface | Overwatered, wet medium | Let the surface dry between waterings; see our organic pest control for home gardens guide for sticky traps and other non-chemical steps |
What do you do with microgreens after the first tray? A simple sowing rotation
Sow one tray every three or four days so you always have one ready. Keep two crops running, such as radish (fast) and sunflower or pea (slower), and rotate trays between the dark and light zones. When you grow tired of trays, move up to pots of cold-season vegetables.
| Day | Action |
|---|---|
| Day 1 | Sow tray A (radish). Cover and weight it |
| Day 3 | Uncover A and move to light. Sow tray B (mustard or fenugreek) |
| Day 4 to 5 | Soak sunflower or pea for tray C if you want it |
| Day 8 to 10 | Harvest A. Sow tray D. Clean A's tray, discard the mat |
| Day 10 to 12 | Harvest B. Sow tray E. |
When you want bigger harvests, try pots. Our list of 15 winter vegetables to grow in pots shows what to sow in October for the cooler season. Fenugreek, radish and mustard are on both lists: tray microgreens are the quick version, pots are the longer one.
Conclusion
Microgreens reward a careful beginner: a tray of radish, mustard or fenugreek on clean cocopeat can be ready in about 8 to 12 days, with little space and low cost. The real work is in the details: untreated seed, a dark start, good light, bottom watering, airflow and clean trays. Eat them raw only if you accept a small food safety risk, and take extra care for children, older adults and anyone with a weak immune system. Treat nutrition claims as laboratory findings, and test your own yield and buyers before you think of selling.
Questions Farmers Ask
What are microgreens?
How do you grow microgreens at home?
What is the easiest microgreen to grow?
How long do microgreens take to grow?
What is the difference between sprouts and microgreens?
Can you grow microgreens in cocopeat?
Why is mould growing on my microgreens?
Are microgreens safe to eat raw?
Do microgreens regrow after cutting?
How do you store microgreens?
Are microgreens more nutritious than mature vegetables?
Can you make money growing microgreens?

Microbiologist
Microbiologist at Katyayani Organics. MSc in Microbiology, 2.6 years of experience.
View all authors

Leave a Comment